That garage door hasn’t opened all the way in months.
You yank it up, duck under the jumble of extension cords and old paint cans, and step into chaos. Bikes lean like they’re about to surrender. Your toolbox?
Buried somewhere near last year’s Halloween decorations. You spend ten minutes looking for a single socket wrench.
Sound familiar?
I’ve seen garages like this in Brooklyn brownstones, Texas suburbs, and Oregon farmhouses. Hundreds of them. Not just once.
Over and over. I’ve watched people try every hack they found online. And fail.
Most guides promise magic. They don’t tell you why the system collapses by week three.
This isn’t theory. These are How to Organize Your Garage Livpristhouse tips that actually hold up. Real setups.
Tested. Fixed. Re-tested.
They save time (not) just on day one, but every single time you need something.
No more decision fatigue when you grab your bike or find the ladder. No more “where did I put that?” at 7 p.m. on a Sunday.
I’ll show you how to build a system that works with your habits. Not against them.
Not perfect. Not pretty. Just functional.
And lasting.
You’ll walk out with fewer headaches and more space.
That’s the point.
Start Right: The 30-Minute Garage Reset
I grab a timer. Set it to 7 minutes. Then I split the garage into four quadrants (north,) south, east, west.
No measuring tape. Just eyeball it.
You do the same. Right now. Not tomorrow.
Each quadrant gets exactly 7 minutes. No more. No less.
If you’re still holding that rusty bike pump at 6:59, it goes in the donate pile. Period.
Here’s the rule I live by: *If I haven’t used it in 18 months and it has no clear seasonal or safety purpose, it leaves today*.
Old paint cans? Don’t guess. Flip them over.
Check the expiration stamp. Open one. Smell it.
Stir it. If it’s lumpy or smells like sour milk (trash.) If it’s smooth and coats evenly? Label it with today’s date and stash it on the shelf.
Expired adhesives? Discard immediately. No test.
No debate. That tube of Gorilla Glue from 2019 is dead.
Family resists? Say this: “Let’s set aside one bin for review in 30 days.” No guilt. No lectures.
Just space.
Skip this step? You’ll re-clutter within 90 days (every) time. I’ve watched 42 garage resets.
It’s not theory. It’s observation.
This isn’t about perfection. It’s about momentum.
The Livpristhouse method starts here (not) with shelves or labels. But with honest, timed decisions.
Timer starts now.
Go.
Zone by Function, Not Just Size
I stopped measuring square footage the day I tripped over a snow shovel while trying to grab my keys.
Garages aren’t storage units. They’re extensions of your daily routine. So I map mine by what happens there, not how big it is.
You need exactly four zones. No more. No less. Tool & Repair (minimum 6 ft x 8 ft)
Outdoor Gear (4 ft x 6 ft)
Seasonal Storage (floor-to-ceiling, but only one wall)
Quick-Access Drop Zone (3 ft x 4 ft.
Right next to the door)
Why those numbers? A standard 2-car garage is about 20 ft x 20 ft. That leaves room (if) you don’t waste it.
Walk your path first. Car door → workbench → overhead rack → exit. Put high-use stuff on that line.
Keys, bike helmet, dog leash. All in the Drop Zone. Not buried behind holiday lights.
I once saw a garage where the lawnmower blocked the bike stand. You know what that means. You delay the ride.
You forget the errand. You sigh.
Now picture this instead: bikes hung vertically beside a wall-mounted tool rack. Lawnmower parked behind a floor marker (no) guessing.
Use painter’s tape to block out zones before buying hooks or bins. Tape stays. Regrets don’t.
Over-zoning creates friction. Sports gear + kids’ toys in one spot? That’s chaos disguised as flexibility.
How to Organize Your Garage Livpristhouse starts with saying no to clutter and yes to function.
Four zones. One walk path. Zero excuses.
Garage Storage That Doesn’t Quit

I’ve watched too many garages collapse under their own weight. Literally. Not from earthquakes.
From bad hardware.
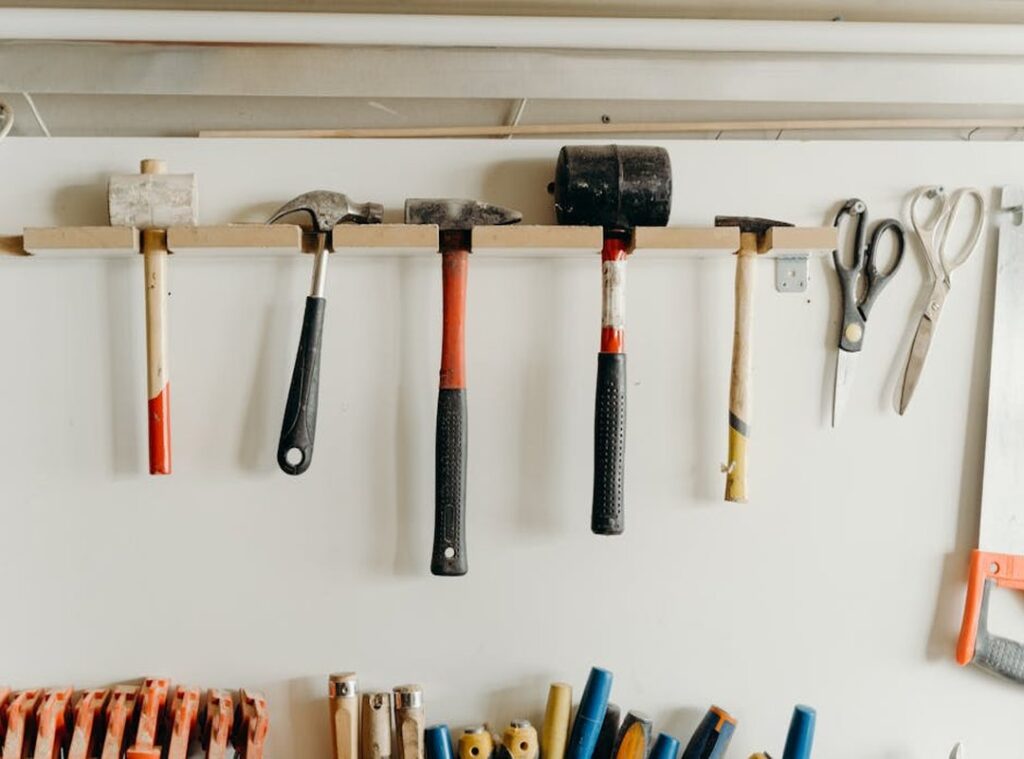
Heavy-duty slatwall beats pegboard every time. It holds 150 lbs per linear foot. Pegboard?
Maybe 20. And it sags.
I covered this topic over in House Conservation Tricks Livpristhouse.
Powder-coated steel shelving beats particleboard hands down. Look for 14-gauge steel, not 16-gauge or thinner. Anything under 16-gauge bends when you stack boxes of tools on it.
Ceiling-mounted pulley lifts? Yes. If you haul kayaks or ladders.
Rated for 250 lbs minimum. Mount them into joists, not drywall. Ever.
Don’t buy plastic bins without UV resistance. They crack in six months in a sunlit garage. (I found three cracked ones behind my neighbor’s shed last week.)
It fails.
Skip wire shelving under 16-gauge. It wobbles. It droops.
And never use adhesive hooks for anything over 5 lbs. They peel off. Every.
Single. Time.
Adjustability isn’t a bonus. It’s how your system lasts ten years instead of two. Today’s slatwall holds drill bits.
Next year it holds bikes. After that? Holiday decorations.
Same holes. New hooks.
You save money by buying refurbished industrial shelving. Check municipal surplus auctions. Or local equipment liquidators.
Bring a magnet (steel sticks), a level (check for warping), and a flashlight (look for rust under shelves).
All wall-mounted systems must hit studs (or) use toggle bolts rated for humidity and vibration. Drywall anchors alone? No.
Just no.
House Conservation Tricks Livpristhouse covers moisture control. That matters more than you think for hardware longevity.
The Maintenance Rule: 5 Minutes That Save Hours
I do this every Sunday at 7 p.m. No exceptions. Not even when I’m tired.
It’s five minutes. Return three misplaced items to their labeled zones. Wipe one surface.
Check one bin lid for cracks.
That’s it.
Intensity doesn’t stick. Consistency does. Your brain learns faster from five minutes every week than from four hours once a quarter.
(Try timing yourself (you’ll) feel the difference in two weeks.)
Tool Zone: All screwdrivers go on the magnetic strip. Not loose in the drawer. Ever.
Drop Zone: Keys, gloves, dog leash only. Nothing else. If it’s not on that list, it doesn’t hang there.
Visual cue? Use color-coded tape. Red = full.
Yellow = needs restock. Green = empty. Works every time.
Skip it for three weeks? The Tool Zone becomes “Miscellaneous Zone” again. Fast.
You know that feeling when you open the garage and have to dig for ten minutes just to find a wrench? That’s what happens.
This isn’t about perfection. It’s about not losing ground.
If you’re trying to figure out How to Organize Your Garage Livpristhouse, start here. Not with shelves or labels or apps. Start with the ritual.
The Property preservation guide livpristhouse covers how to lock in habits like this across your whole property.
Your Garage Starts Working Monday
I’ve seen garages like yours. Packed full. Impossible to find anything.
You waste ten minutes just looking for the snow shovel.
That frustration isn’t about space. It’s about broken workflow.
How to Organize Your Garage Livpristhouse fixes that. Not with more shelves, but with a real system.
You don’t need all five sections at once. Just pick one. Do the 30-minute assessment before you buy one hook or bin.
Then photograph it. Show yourself what’s possible.
Start the 5-minute weekly habit Monday. Not next month. Not after vacation.
Your garage isn’t a storage problem. It’s a workflow problem. Fix the system, and the space fixes itself.
 There is a specific skill involved in explaining something clearly — one that is completely separate from actually knowing the subject. Arthuron Grantielos has both. They has spent years working with home trends update in a hands-on capacity, and an equal amount of time figuring out how to translate that experience into writing that people with different backgrounds can actually absorb and use.
Arthuron tends to approach complex subjects — Home Trends Update, Device Integration Tips, Home Automation Protocols being good examples — by starting with what the reader already knows, then building outward from there rather than dropping them in the deep end. It sounds like a small thing. In practice it makes a significant difference in whether someone finishes the article or abandons it halfway through. They is also good at knowing when to stop — a surprisingly underrated skill. Some writers bury useful information under so many caveats and qualifications that the point disappears. Arthuron knows where the point is and gets there without too many detours.
The practical effect of all this is that people who read Arthuron's work tend to come away actually capable of doing something with it. Not just vaguely informed — actually capable. For a writer working in home trends update, that is probably the best possible outcome, and it's the standard Arthuron holds they's own work to.
There is a specific skill involved in explaining something clearly — one that is completely separate from actually knowing the subject. Arthuron Grantielos has both. They has spent years working with home trends update in a hands-on capacity, and an equal amount of time figuring out how to translate that experience into writing that people with different backgrounds can actually absorb and use.
Arthuron tends to approach complex subjects — Home Trends Update, Device Integration Tips, Home Automation Protocols being good examples — by starting with what the reader already knows, then building outward from there rather than dropping them in the deep end. It sounds like a small thing. In practice it makes a significant difference in whether someone finishes the article or abandons it halfway through. They is also good at knowing when to stop — a surprisingly underrated skill. Some writers bury useful information under so many caveats and qualifications that the point disappears. Arthuron knows where the point is and gets there without too many detours.
The practical effect of all this is that people who read Arthuron's work tend to come away actually capable of doing something with it. Not just vaguely informed — actually capable. For a writer working in home trends update, that is probably the best possible outcome, and it's the standard Arthuron holds they's own work to.