If you’re searching for the best way to manage temperatures across different areas of your home, you’re likely considering a smart thermostat multi room setup. The goal is simple: better comfort, lower energy bills, and precise control over how each space feels throughout the day. But with multiple devices, compatibility concerns, and automation protocols to think about, it’s easy to feel unsure about where to start.
This guide is designed to walk you through exactly how a multi-room configuration works, what you need to set it up properly, and how to avoid the most common integration mistakes. We’ll break down zoning basics, device pairing, and automation tips in a clear, practical way.
Our recommendations are based on extensive research into connected home systems, real-world integration scenarios, and the latest smart living innovations—so you can make confident decisions and build a system that truly works for your home.
Achieve Perfect Comfort in Every Room: Your Multi-Zone Smart Thermostat Guide
As you explore the benefits of connecting smart thermostats to multi-room systems, it’s also important to be aware of potential integration challenges, which you can read about in our article on Troubleshooting Common Smart Device Integration Issues.
If one bedroom feels like a sauna while the living room feels like a freezer, you’re dealing with poor zoning—uneven temperature distribution caused by a single thermostat controlling multiple spaces. The fix? A smart thermostat multi room setup that uses sensors or dampers to create independent “zones” (separate temperature-controlled areas).
Follow these steps:
- Place wireless sensors in high-use rooms.
- Group rooms by usage patterns (sleep, work, relax).
- Set schedules based on occupancy, not guesswork.
- Adjust airflow vents for balance.
Pro tip: Start with two zones, then expand once performance is consistent.
The Core Components of a Multi-Room System
A multi-room climate system isn’t magic—it’s a coordinated team of devices working together.
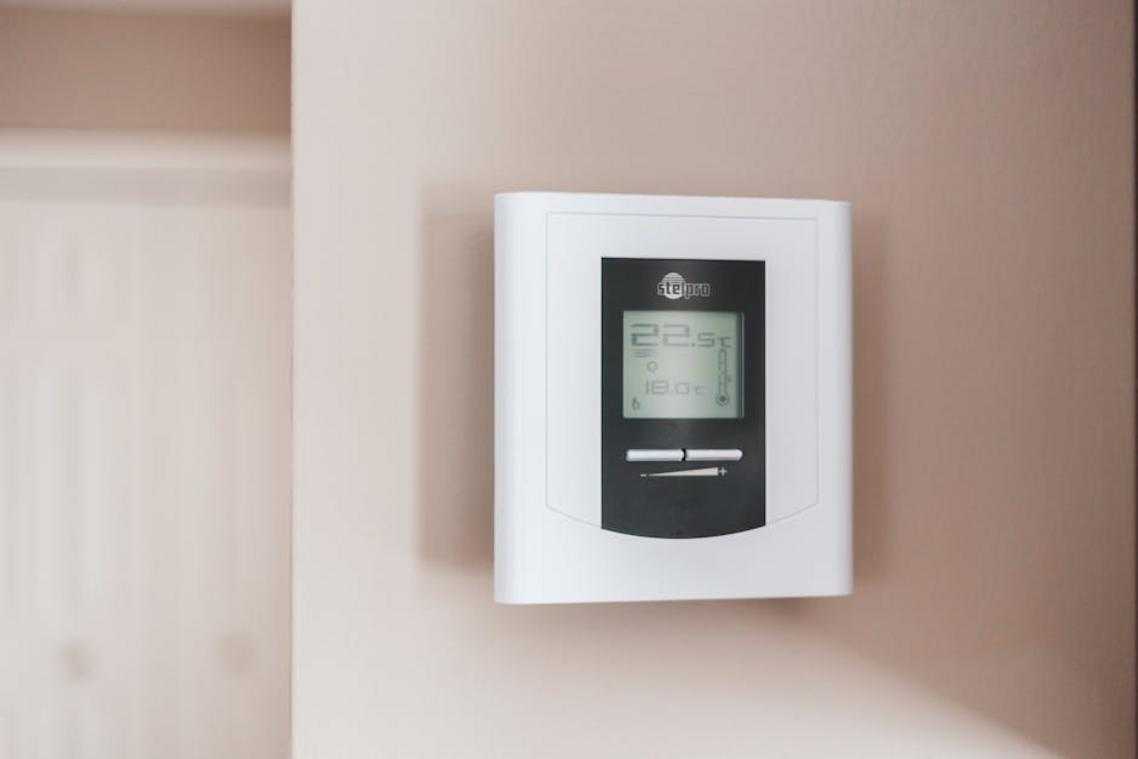
The Brains: The Main Smart Thermostat
This is the command center. It connects to your HVAC (heating, ventilation, and air conditioning) system and Wi‑Fi, translating your comfort settings into action.
The Eyes and Ears: Remote Temperature Sensors
These wireless sensors track temperature in individual rooms and send data back to the thermostat. Instead of guessing comfort based on hallway air (which, let’s be honest, no one sleeps in), it responds to lived-in spaces.
Some critics argue sensors are unnecessary add-ons. But studies show temperature variations between rooms can reach 5–10°F in typical homes (U.S. DOE), which directly impacts comfort and efficiency.
The Gatekeepers (Optional): Smart Vents
Smart vents automatically open or close to direct airflow precisely where needed.
In a smart thermostat multi room setup, the system averages readings or prioritizes selected rooms, running HVAC cycles based on occupancy—not guesswork.
Choosing the Right Smart Thermostat Ecosystem for Your Home
Before you fall in love with a sleek wall display, start with the basics: HVAC compatibility. Your HVAC (Heating, Ventilation, and Air Conditioning) system determines what thermostat will actually work. First, turn off power and check for a C-wire (common wire)—this wire provides continuous power to smart thermostats. No C-wire? You may need an adapter. Most modern systems (single-stage, multi-stage, and heat pumps) are compatible, but always verify with the manufacturer’s compatibility checker. (Five minutes here can save you a Saturday afternoon headache.)
Option 1: Sensor-Based Systems
Sensor-based systems—like Ecobee or Google Nest—use small wireless temperature sensors placed in different rooms. Instead of relying on hallway readings, the thermostat averages data or prioritizes a specific room. For example, if your bedroom runs hotter than your living room, you can schedule the system to prioritize the bedroom at night. This type of smart thermostat multi room setup works well for open floor plans or mild imbalances.
Some critics argue sensors only “mask” airflow problems rather than fix them. Fair point. However, ENERGY STAR notes that smart thermostats can save about 8% annually on heating and cooling (energystar.gov), making them a practical first step before costly ductwork changes.
Option 2: Smart Vent-Based Systems
If one room feels like a sauna and another like a fridge, smart vents (like Flair or Keen) physically adjust airflow. This creates true zoning—meaning you control airflow room by room. Installation is straightforward: replace vents, sync with your thermostat, and calibrate through the app.
Pro tip: Start with the room that’s consistently uncomfortable and monitor results for two weeks before expanding.
Finally, weigh layout, imbalance severity, budget, and how much control you actually want. And as your home gets smarter, consider related upgrades like syncing security cameras with mobile apps to unify your ecosystem.
A Step-by-Step Guide to Installation and Sensor Placement
Safety First: Power Down Your HVAC
Before you touch a single wire, head to your breaker box and switch off power to your heating and cooling system. This prevents electrical shock and protects sensitive components from short circuits. Even if your thermostat screen is blank, don’t assume the power is off (that’s how weekend projects turn into emergency calls). When in doubt, use a voltage tester to confirm.
Installing the Main Thermostat
Once the power is off, carefully remove the old thermostat faceplate. As you disconnect each wire, label it according to its terminal (R, W, Y, G, etc.). These letters correspond to specific HVAC functions—like heating (W) or cooling (Y). Next, mount the new backplate, ensuring it’s level for accurate internal readings. Connect the labeled wires following the manufacturer’s app or manual, then snap the new faceplate into place. Restore power and complete the setup in the app.
Strategic Sensor Placement for Accuracy
Now comes the part that truly optimizes a smart thermostat multi room setup: sensor placement. Sensors detect temperature in specific rooms and communicate with the thermostat to balance comfort. Place them in frequently used spaces—bedrooms, living rooms, and home offices—at about chest height for the most accurate readings.
Sensor Placement “Don’ts”
However, avoid direct sunlight, drafty windows, kitchens, hallways, or spots above electronics like TVs. These areas fluctuate quickly and distort readings. Pro tip: give each sensor a few days and review temperature data before finalizing placement. Small adjustments can make a noticeable difference.
Configuring Your Zones for Maximum Efficiency and Comfort
Setting up your thermostat starts in the app. First, connect it to Wi‑Fi by following the on‑screen prompts. Then, name each sensor based on its location—like “Master Bedroom” or “Living Room.” A sensor is simply a small device that measures temperature in a specific room, allowing your system to respond to real conditions instead of guessing from the hallway.
Next, create schedules and comfort settings. In simple terms, a schedule tells your system when to heat or cool, while a comfort setting determines which rooms matter most at that time. For example, prioritize bedroom sensors during “Sleep” and common areas during “Home.” This is the backbone of an effective smart thermostat multi room setup.
Some people argue automation overcomplicates things. However, features like geofencing—adjusting temperature based on your phone’s location—and smart learning actually reduce manual tweaks over time. In other words, once it learns your routine, it works quietly in the background (like a stagehand, not the lead actor).
Your smart thermostat multi room setup is complete, and the payoff starts now. No more guessing which room feels like a sauna or an icebox (goodbye, thermostat wars). By collecting temperature data from spaces, the system balances airflow, cutting hot and cold spots while trimming energy waste. According to the U.S. Department of Energy, smart thermostats can save 8% annually on heating and cooling (energy.gov). That means comfort and savings.
| Benefit | What You Gain |
| Comfort | Even temperatures |
| Efficiency | Lower bills |
Pro tip: review energy reports in the app and tweak schedules.
Bring Comfort and Control to Every Room
You started this guide because managing temperatures across multiple rooms felt frustrating, inconsistent, and inefficient. Now you understand how zoning works, how devices communicate, and how to configure a smart thermostat multi room setup that delivers balanced comfort throughout your home.
The real advantage isn’t just convenience — it’s eliminating hot and cold spots, reducing wasted energy, and finally having every room feel exactly the way it should. When your system is properly configured and integrated, your home works with you instead of against you.
If uneven temperatures and rising energy bills are still causing headaches, it’s time to act. Upgrade to a professionally optimized multi-room configuration and experience seamless automation, lower utility costs, and precise comfort control. Join thousands of homeowners who have already transformed their spaces with top-rated smart climate solutions.
Take the next step today — review your current setup, choose compatible devices, and implement your optimized configuration now to enjoy a smarter, more comfortable home.
 Thalira Rothwynd writes the kind of smart interior innovations content that people actually send to each other. Not because it's flashy or controversial, but because it's the sort of thing where you read it and immediately think of three people who need to see it. Thalira has a talent for identifying the questions that a lot of people have but haven't quite figured out how to articulate yet — and then answering them properly.
They covers a lot of ground: Smart Interior Innovations, Connected Living Basics, Home Trends Update, and plenty of adjacent territory that doesn't always get treated with the same seriousness. The consistency across all of it is a certain kind of respect for the reader. Thalira doesn't assume people are stupid, and they doesn't assume they know everything either. They writes for someone who is genuinely trying to figure something out — because that's usually who's actually reading. That assumption shapes everything from how they structures an explanation to how much background they includes before getting to the point.
Beyond the practical stuff, there's something in Thalira's writing that reflects a real investment in the subject — not performed enthusiasm, but the kind of sustained interest that produces insight over time. They has been paying attention to smart interior innovations long enough that they notices things a more casual observer would miss. That depth shows up in the work in ways that are hard to fake.
Thalira Rothwynd writes the kind of smart interior innovations content that people actually send to each other. Not because it's flashy or controversial, but because it's the sort of thing where you read it and immediately think of three people who need to see it. Thalira has a talent for identifying the questions that a lot of people have but haven't quite figured out how to articulate yet — and then answering them properly.
They covers a lot of ground: Smart Interior Innovations, Connected Living Basics, Home Trends Update, and plenty of adjacent territory that doesn't always get treated with the same seriousness. The consistency across all of it is a certain kind of respect for the reader. Thalira doesn't assume people are stupid, and they doesn't assume they know everything either. They writes for someone who is genuinely trying to figure something out — because that's usually who's actually reading. That assumption shapes everything from how they structures an explanation to how much background they includes before getting to the point.
Beyond the practical stuff, there's something in Thalira's writing that reflects a real investment in the subject — not performed enthusiasm, but the kind of sustained interest that produces insight over time. They has been paying attention to smart interior innovations long enough that they notices things a more casual observer would miss. That depth shows up in the work in ways that are hard to fake.